Bladed Scarf Joint with Tenons
Part III: the opposite member.

 
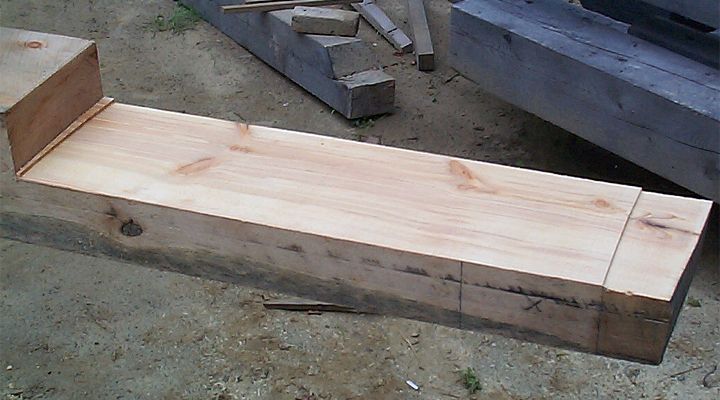
   Here is the pine timber which will become the second half of my sill. I was going to look into milling a second hickory myself but I wound up reducing the first hickory timber to a length that required the second member to be longer than my mill, so I decided to stick with the timbers I had purchased.
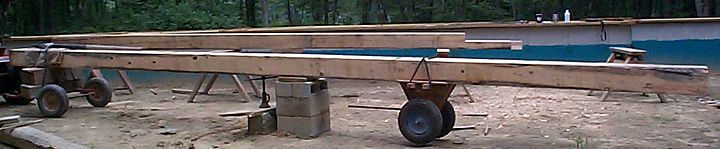
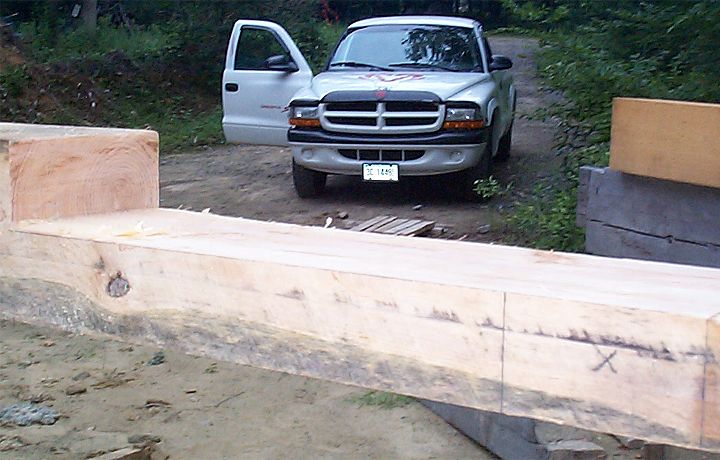
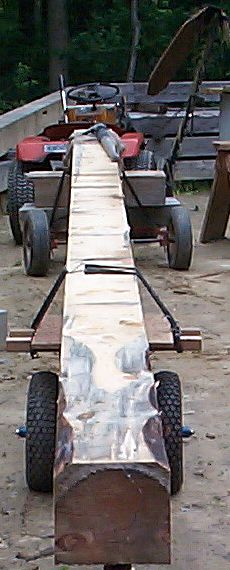
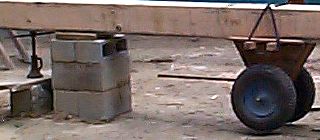
   The picture to the left shows the pine timber freshly arrived. Above is my solution to moving a timber solo when it weighs more than twice what I can lift. First I erect a solid column of concrete blocks under the timber just beyond the balance point then set a screw jack as close to the column as I can and still have room to turn the screw. The timber is then jacked up until the wheels of the timber cart leave the ground and the column can be capped with a nice smooth piece of pressure treated lumber. 
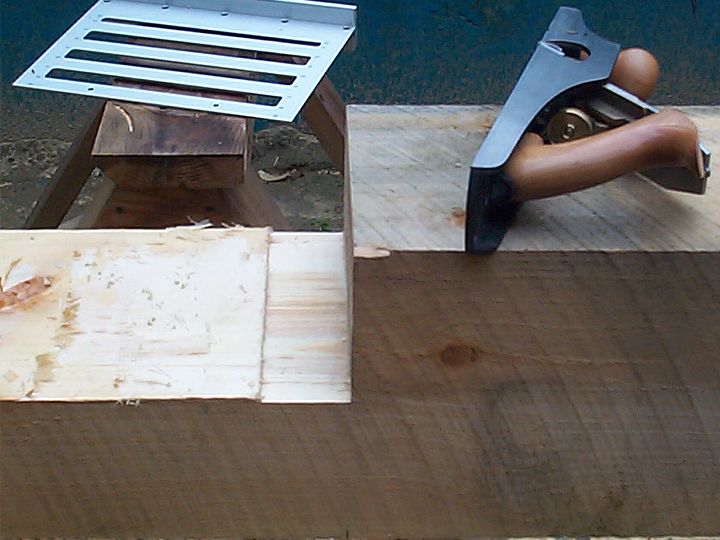
Here is an enhanced view.
   At this point I can release the bungies holding the timber cart and get it out of the way then drop and remove the jack so that the timber is solidly on the column. Once the other end of the timber is detached from the tractor it's a very simple matter to pivot it up off the tractor and onto a waiting sawhorse. I control it from the far end with downward pressure while using the column as a pivot point. Once I'm onto sawhorses I control it by lifting the end I intend to move as added downward pressure might crush a sawhorse. When on sawhorses it's supported at roughly the 1/3 and 2/3 positions, in this position I'm lifting ~1/3 of the weight and the sawhorse holds the remaining 2/3, were I to push down to raise the far end then the sawhorse would have to hold ~4/3 of the timber's mass.


   Here I show extreme confidence in my cutting by laying out all my lines before performing the long rip and shoulder cuts. Actually it isn't so much confidence as the hour of the day. By taking the time to layout and recheck every line before I prepared the timbers position and adjusted the Timberjig for the cut I was able to be productive up to the time Debbie got home from the bank to watch.
   The Timberjig is as safe as or safer than most power tools so the main thing a watcher needs to do is stay at a safe distance and yell if the saw appears to be cutting into wood we want preserved. Were a sawhorse to fail things could get dicey, and with ear protectors on and the saw running you'll never hear a sawhorse cracking.


   Here we see the completed ripcut and shoulder cut with the "tenon saw" still in it, on this side of the timber I've run out of saw with about 1/8" to go. You can see I'm well above the line on my rip cut, this is because one of my guides is running along a non reference face of the timber. All layout lines are referenced to the two sides adjacent to the squarest corner of the timber, so setting a guide on a non-reference face means inheriting all the errors produced at the sawmill plus any distortion the timber may have picked up since. To perform this cut precisely I should flip the timber over and set the blade to cut below the line, however given the nature of the Timberjig most errors will make the blade rise in the timber and I've got planes to play with.


   This is the side the Timberjig was cutting from, again the cut is climbing slowly away from the line. By comparing the two pictures you can tell I've set the blade far closer to perfectly square than I did in the hickory. On this side the tenon saw has made it all the way down to the line with no blade to spare so the corner I was referencing from is slightly less than 90 degrees.
   The absolute best way to have performed this cut is this same side up but with the Timberjig running on a set of guide boards clamped to the timber. Guide boards are still on my to do list.


   Here is the blade freshly exposed and that chainsaw cut is every bit as smooth as it looks. You can also see where I've used the waste area of the timber to determine the final setting for depth of cut on the Timberjig.

   This shot was taken barely 20 minutes later and my Stanley has already taken down all the excess material from the tip all the way back to the point where the plane's toe hits the shoulder. This is where I left off on a Thursday evening at ~7pm, torrential rain for the next 30 plus hours afforded me the time to edit these pages.


   On the timber is my new TFG logo edition Lie-Nielsen 10 1/4 Rabbet Plane, and that swath along side the shoulder of the scarf joint is what it can do in approximately 90 seconds. If you look very closely at the leading edge of the timber in the bottom of that rabbet you can see a very fine line of wood that is still standing above the cut made by my layout knife. Pretty impressive for working across the grain!
   This plane has one very important feature that sets it head and shoulders above any other single rabbet plane, both the rear handle (tote) and front knob can be set at an angle (either direction) to the body of the plane which means you can go right along the shoulder of the joint without taking skin off your knuckles.
   After adding the mortise and tenon to this timber our next step is fitting the scarf joint.

(home)