Bladed Scarf Joint with Tenons
This scarf joint joins two timbers into a long single sill.


If you didn't see the beginning of this long cut you might want to see the Timberjig Page; a link there will bring you back.
The tear out at the end of the cut is caused by harder wood being closer to the surface, you'll see this better in some of the following pictures.


   This is a seriously ugly shoulder cut. I started it with my 8-1/2" circular saw, affectionately known as "The Rockwell". It's actually a reconditioned Porter Cable replacement for the original Rockwell which UPS lost on it's way back from being repaired. It's also called the Rockwell because it does cut rock quite well. I've probably cut close on half a mile of bluestone with a single Pearl diamond blade which can still sever a modern brick is just three passes if you want to push it hard. As the Pearl blade retails for more than the average contractors saw I'm not about to push any harder than it wants.
   For my first pass on the shoulder cut I set the blade shallow, but the foot slipped and plunged the blade which deflected slightly off the line for the remainder of it's passage. The blade is also far to dull for working in hickory and probably not the ideal tooth pattern (it's a "high end" carbide blade purchased years ago to cut mostly "conventional" framing materials and plywood). In softwood framing lumber this blade cuts like a new 7-1/4" Makita, but it started burning streaks in thicker plywood a few years back. I sent out all my steel 8-1/2" blades to be sharpened unfortunately the fellow doing it failed miserably and all the blades cut curves to the right, except the one handsaw I sent, which he managed to enhance the blades unfortunate warp to the left as well a set the teeth slightly askew... And don't get me started on what he did to my 1-1/2" boring machine bit!


   The Timberjig supplies a number of guide surfaces set square & parallel to the blade, but for this cut I reset it tip high to make sure I wouldn't cross a line I couldn't see. Here you can clearly see where the tip of the saw deflected upward as the jig's guides left the wane.


   I also purposely set the tip of the saw angled back in the cut, the 1/4" wedge of material comes off quickly with a sharp chisel. At the far end of the shoulder you can see my line to the left of the cut, at this point I could recut the shoulder or pare it down to the line with the appropriate plane or a sharp chisel.
Paring is the pennance of imprecision...
   As I don't have the right plane for this sort of work I spent a good deal of time paring with my G.I.Mix framing chisel. In hindsight recutting the shoulder with a handsaw would have been far faster.


   Here is the shoulder pared back flat and square, I've also to trued up the blade portion of the joint where it meets the shoulder. In theory I should be able to finish this process with a smoothing plane. The practical reality is my Stanley #26 just can't handle hickory knots so a combination of plane and chisel work was called for.


   First layout lines for the tenon, precision counts here as this isn't the easiest scarf joint to adjust.


   Here you can see the full set of lines and my version of a tenon crosscut saw. The saw is actually a large mitre box saw, it's longer than a tenon saw and has finer teeth. It's extremely sharp and produced this cut in a reasonable amount of time. This day started with intermittant light rain so the grain on the wood really pops.


   Here is my version of a tennon ripcut saw. It's a new arrival courtesy of The Japan Woodworker Catalog. The japanese handsaw cuts on the pull rather than the push stroke so the blade is thinner. This saw cuts quickly and precisely with minimal effort.


   Love the wood grain on this shot.


   This is a really nice smooth cut; it's actually two cuts as you cut only the side you can see.


   Cutting the opposite shoulder I run out of saw before I run out of material.


   It's Bud-C to the rescue. Don't let the reshaped damaged handle and horribly stained blade fool you this saw is sharper and more comfortable to use than anything you can pick up at the local True Value or Home Depot.


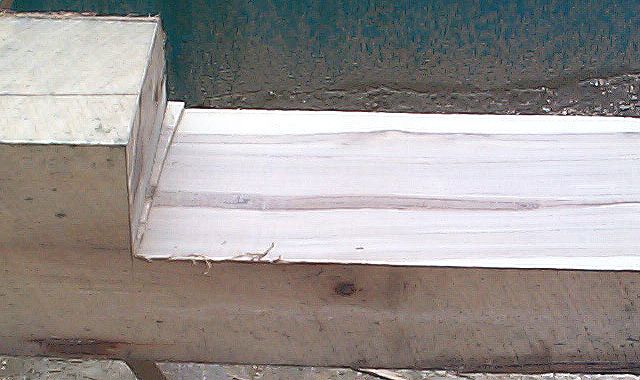
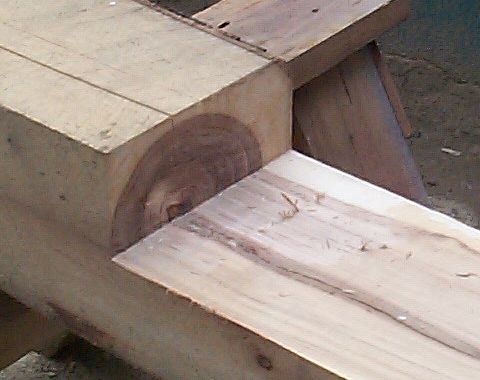
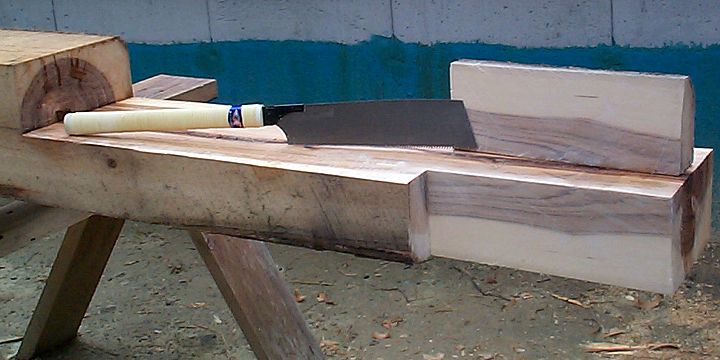
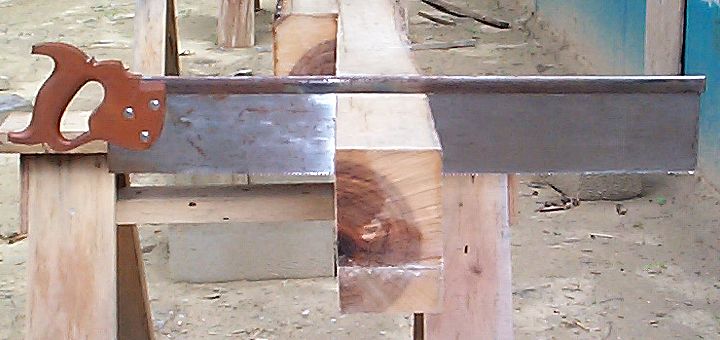
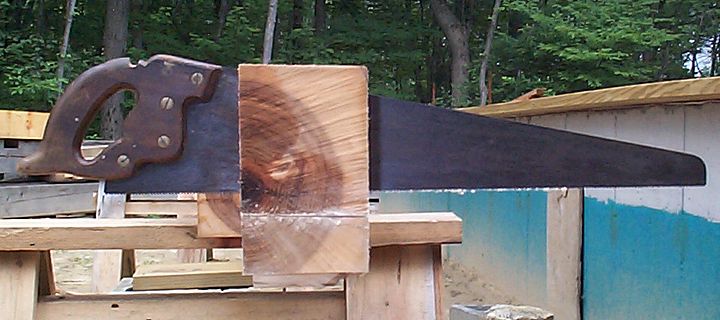
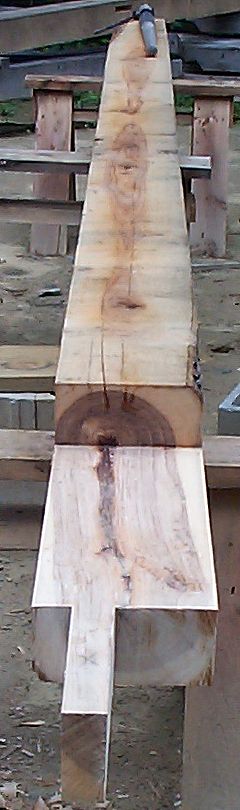
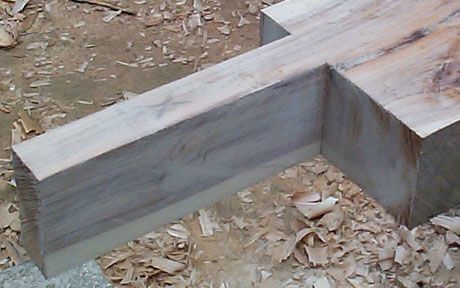
   Above is the nearly finished tenon, it needs to be cut to length and a peg hole. To the left is the full timber and scarf. The scarf still needs a mortise to accept the tenon of the opposite member.
   In a vain attempt to keep the loading times of pages down to a something reasonable; this joint will be concluded on another page.

(home)